The Search Console is a very powerful tool that allows you to have strong visibility on the status of your SEO on Google. But what exactly is it for and how do you configure it to maximize its use?
In this article, I'm going to share with you all the steps for optimal configuration. Ready? Let's get started!
Preface: What is the search console?
The Google Search Console, a service offered to all web site administrators, is a tool that contributes to improving your SEO.
Impressions, click-through rates, position on Google, and other performances will be at your disposal. It is therefore a powerful and essential tool offering you numerous resources to optimize your SEO as best as possible.
If you want to know more, feel free to consult the Google Search Console guide available on the blog.
Create a Google account and sign up for the Google Search Console
This may seem obvious, but first and foremost, you will need to create a Google account if you haven't already done so and log in.
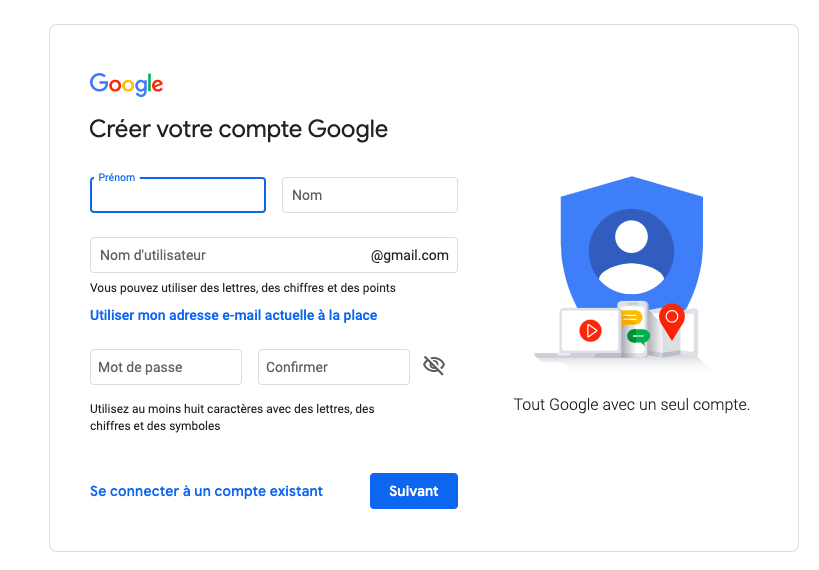
You will be asked for your first name, last name, a username (for the email address), and a password. Click on validate. Once registered, you automatically have access to the various Google tools like the Google Search Console. The next step will be to link your site to it.
Add a property
To add a property, you have two options:
- With the domain name: domainname.com or domainname.fr most often
- With the URL prefix: https://domainname.com
The first will allow you to link the domain and sub-domain(s) in their entirety. Only one authentication option is available to you. You will need to log in to your domain name provider's site, copy and paste the TXT given in the domain's DNS configuration, and validate.
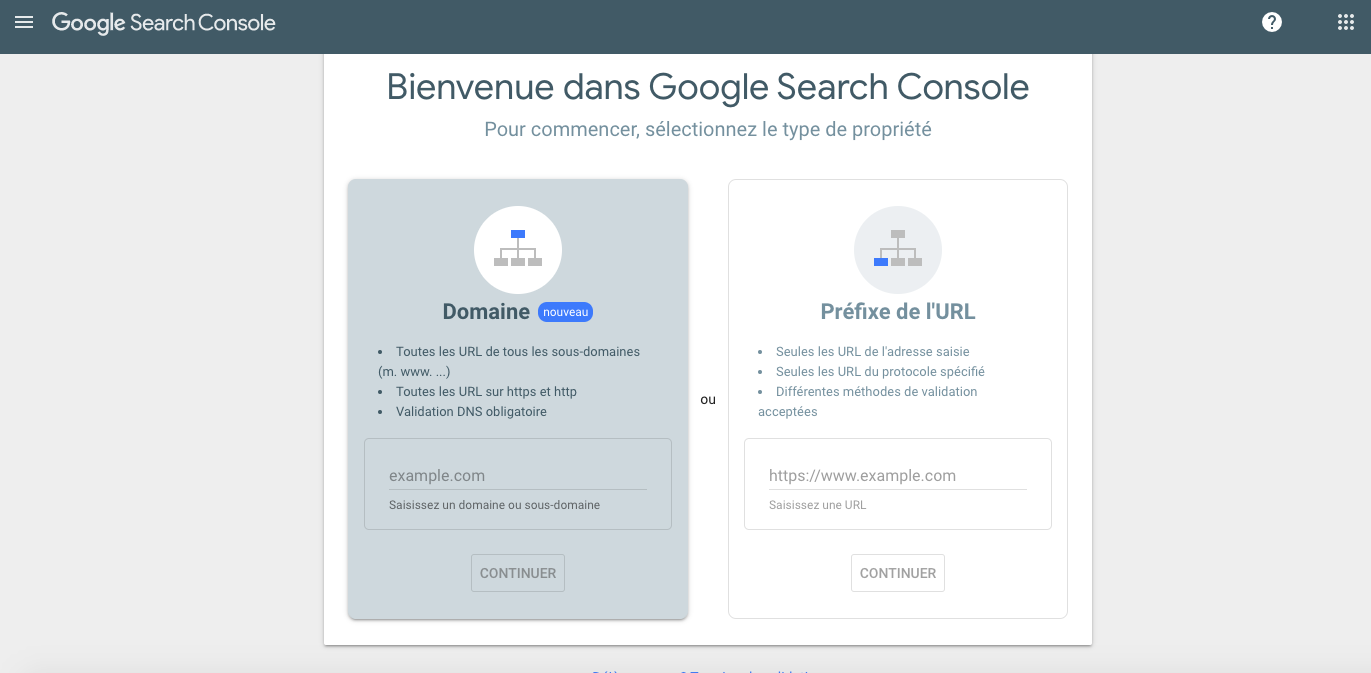
The second can only verify and attach the given URL, i.e., your site alone. If you have attached sub-domains, you will need to repeat the step for each https. Several methods will then be proposed to you. We will detail them below.
Confirm that you are the owner
Google needs to be sure that you are indeed the owner of the site in question, or at least that you have access to it.
It should also be noted that Google will regularly check that your site is still compliant with the chosen validation method. If the validation can no longer be confirmed in this way, your permissions may then expire. There are several methods to confirm that you are indeed the owner of the site. I will present them to you below from the simplest to the most complex.
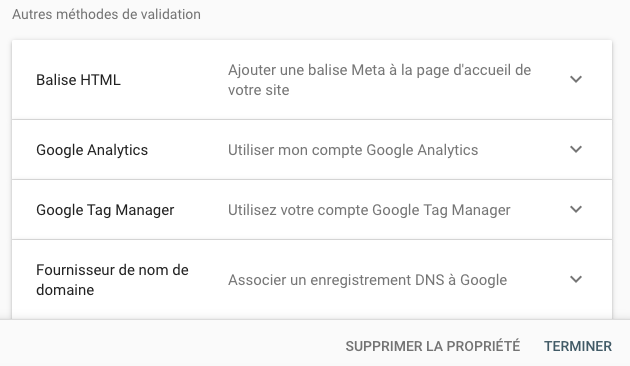
Connect with Google Analytics or Tag Manager
If you already have an Analytics account, you will need to validate it using your Google Analytics tracking code, which must use the analytics.js or gtag.js snippet.
Several types of errors can occur during the validation of the Google Analytics tracking code:
- Snippet not found: check that you have inserted it in the right place on the homepage
- Incorrect snippet: beware, the Search Console only accepts the latest version of the Google Analytics snippet.
- Incorrect snippet type: make sure you are using the Google Analytics code snippet.
- Snippet in the wrong place: it must be located in the
of the homepage.
If you have a Google Tag Manager account, validate the property with a few clicks by following the given instructions. You must, of course, have publishing rights on Google Tag Manager.
Then paste the provided code, without modifying it immediately after the tag
on your page, otherwise, the validation will not work. ### Add an HTML tag to your site's homepage
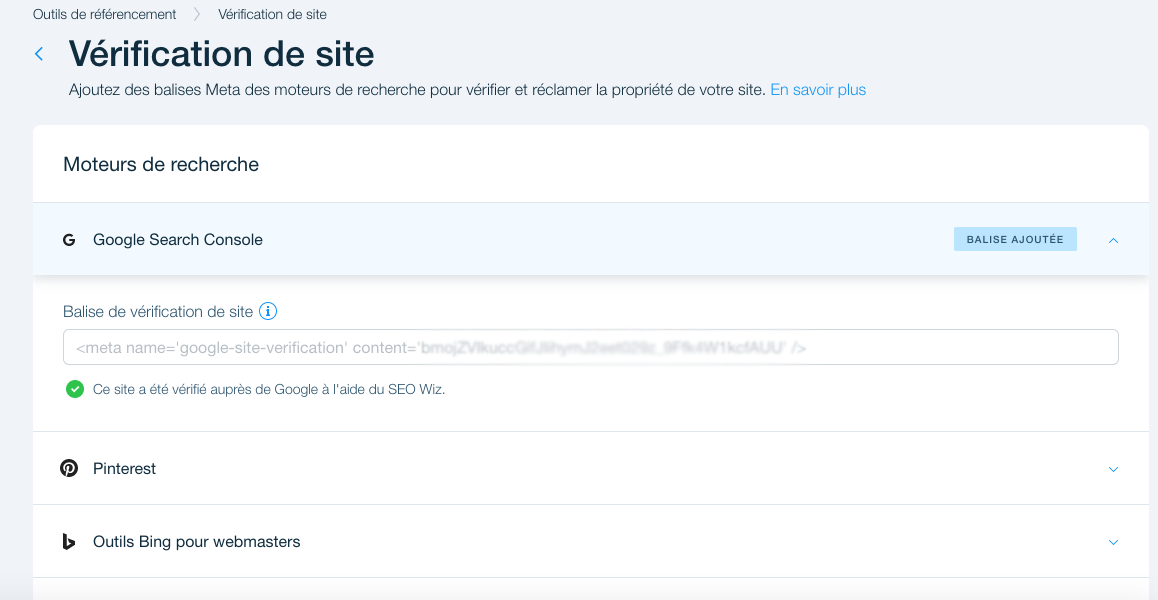
Another option to confirm that you are indeed the owner of a site is to add a tag to the HTML code of your site's homepage. Google then checks that the Meta tag is stored in the indicated location.
Depending on your CMS, this procedure may change a bit, but it remains quite simple to implement.
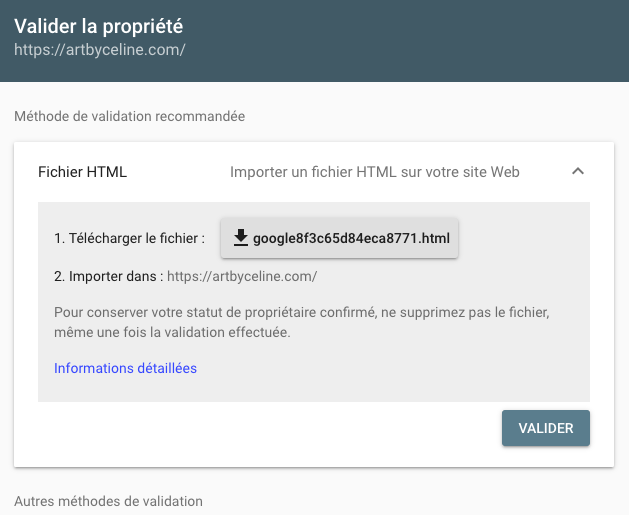
Import an HTML file to your website
If you choose to validate the property in this way, you will need to download the file that Google Search Console offers you. This file will need to be imported to your site. However, be careful because if you remove it from your site (following a theme change, for example), the validation will no longer be valid.
Connect with your domain name
This step is, in my opinion, the most complex. It will require you to have access codes to your domain provider, information that may be missing when the site was created before our arrival in the company by someone who is no longer there or simply by an agency. And I speak from experience. But know that you can validate the ownership of a site by adding a DNS record to your domain name provider.
To do this, you must be connected to your domain name provider (add a new TXT record):
- Generate your TXT record obtained when you choose this option
- Transmit the TXT record to your domain provider
- Validate your property in the Search Console. The validation should normally take place immediately.
However, the application of DNS changes can sometimes take a little time. Google may not find your record immediately. In this case, you will have to wait before validating step 3.
Install the Search Console on Wordpress
Once logged into your Google account, go to the Search Console page and choose the "URL Prefix" option. As seen earlier, you will then need to indicate the address of your site (homepage).
Here, I'm going to show you how to do it by choosing the "HTML Tag" method with Wordpress. For this, you can use an extension like Rank Math or Yoast SEO.
You will need to include on your site's homepage a tag given by Google Search Console. It should be placed in the
before the section . Now, you will need to add this code to your Wordpress site. You will then need to edit a header.php file and paste the code above the tag . If you are using a plugin like Yoast Seo, know that you can link it to your search console account. First, click on "get a Google authorization code" in Search Console. You will then receive a code to copy and insert into the extension. Then click on "authenticate".
Install the Search Console on Wix
Once logged into your Google account, go to the Search Console page and choose the "URL Prefix" option. As seen earlier, you will then need to indicate the address of your site (homepage).
Here, I'm going to show you how to do it with an HTML Tag but this time on WIX. This step is simple and quick to do.
Copy the tag that Search Console offers you. Then log in to WIX. Go to settings, then SEO.

Go to the "add a meta tag" section and click. A page will then open.

All you have to do is paste the tag copied earlier. Then close the window and click on publish. You can now return to the search console, the property should be validated now.
Conclusion
So, which method have you chosen to configure your Search Console?
Need to go further?
If you need to delve deeper into the topic, the editorial team recommends the following 5 contents: